Thursday, June 25, 2020

Week 10

With the body back from sandblasting, I hope to make some major accomplishments this weekend.  My first goal is to finish the major metal work before moving to mechanical.  With so many different areas to tackle, I'm kind of starting in the middle of the car at the sills then I'll work toward the bonnet and then back to the boot.

First things first, I wanted to try and wrap up the cowl frames so I can weld the fenders back on.  When I sent the car off to sandblasting, I bolted the sills to the frame so they'd stay together but they weren't quite done.  The other problem I need to finish tackling is the alignment of the doors.  If you recall back a few posts, I was down to blaming the door for being off but after several measurements, I'm back to assuming something with the body (or hinges).  My problem (or blessing) is that the driver's side is almost perfect but the passenger side is off only at the top.  It would make more sense if both were off, then I could find something in common.
Passenger side after initially mounting the door.

Driver's door initially
Coming to the conclusion that the doors were symmetrical and turning my focus back to the body, the A pillars are very close to each other and the only thing I could find just slightly off were the hinges.
Here are some measurements I took.  The square represents the hinge door mount location.
If all I had to go off of were the measurements, I would have thought the passenger door fit better than the driver's side because it is closer to square.  Since the driver's door is closer, I adjusted the passenger side to match.
After adjustment

After re-installation
Adjusting the passenger side hinge probably got me close enough to be acceptable.  The little bit remaining can be fixed with a little A post manipulation.  Looking at the before and after shots of the driver side, I see it looks the same and is slightly off.  Knowing what helped the passenger side, I think I can get the doors to line up.  

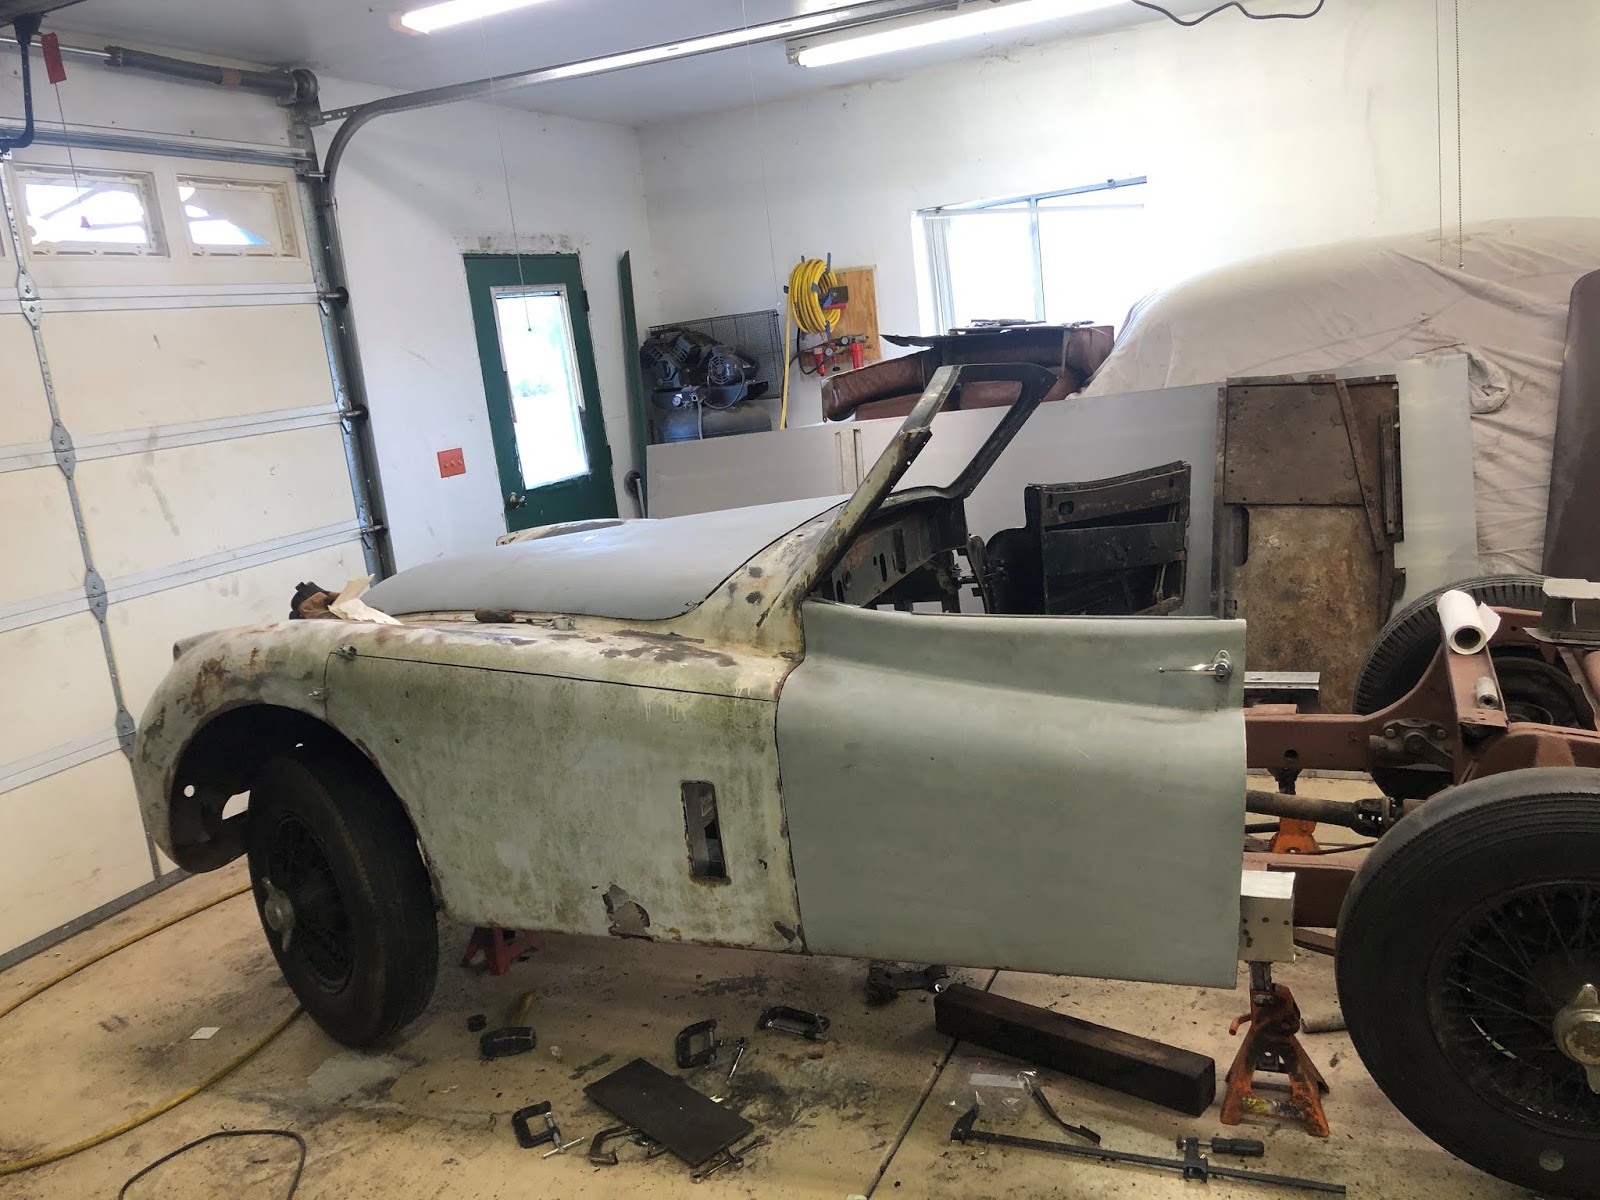
While not quite ready to tie everything together, I wanted to see what it all looked like as a single unit.  Not too bad.


After installing and removing the doors half a dozen times, I decided it was time to do something else.  Following my plan, I turned to the biggest repair job I have left, the fenders.
Here is the passenger side fender after blasting but before prime.  I didn't take a picture after priming.

Driver side
With there being a lot of rust along the bottoms of both fenders, I want to tackle the major spots first.  Since the driver side was a smaller area, I started with it.  
Still have to fix the smaller areas but the big hole is gone.
With the driver side mostly taken care of, I moved on to the passenger side.  With the amount of rust (or now lack of metal), it will take more time and care to return to presentable shape.  Two things I am most concerned with, maintaining the proper curvature of the fender and the straight edge at the bottom.  Fortunately, the way Jaguar made the door bead by folding the bottom edge over allowed enough metal for it to survive the rust and blasting.  To hold it straight, I clamped an aluminum angle across the bottom of the door.  This aligned the bottom seam and gave me a line to use for the replacement metal.
Right side shows the aluminum angle and the door bead at the far right.

Another view at the front where enough metal exists to hold the L bracket in line with the door
With this concern handled for the moment, the next step was mimicking the curvature of the fender.  For the driver side, the hole was small enough, I could bend a piece of metal and use each side as a guide for getting the correct shape.  This side has soooo much metal gone, its much harder.  Another issue is I don't want to use body filler so I'd prefer to patch the whole section in one shot.  

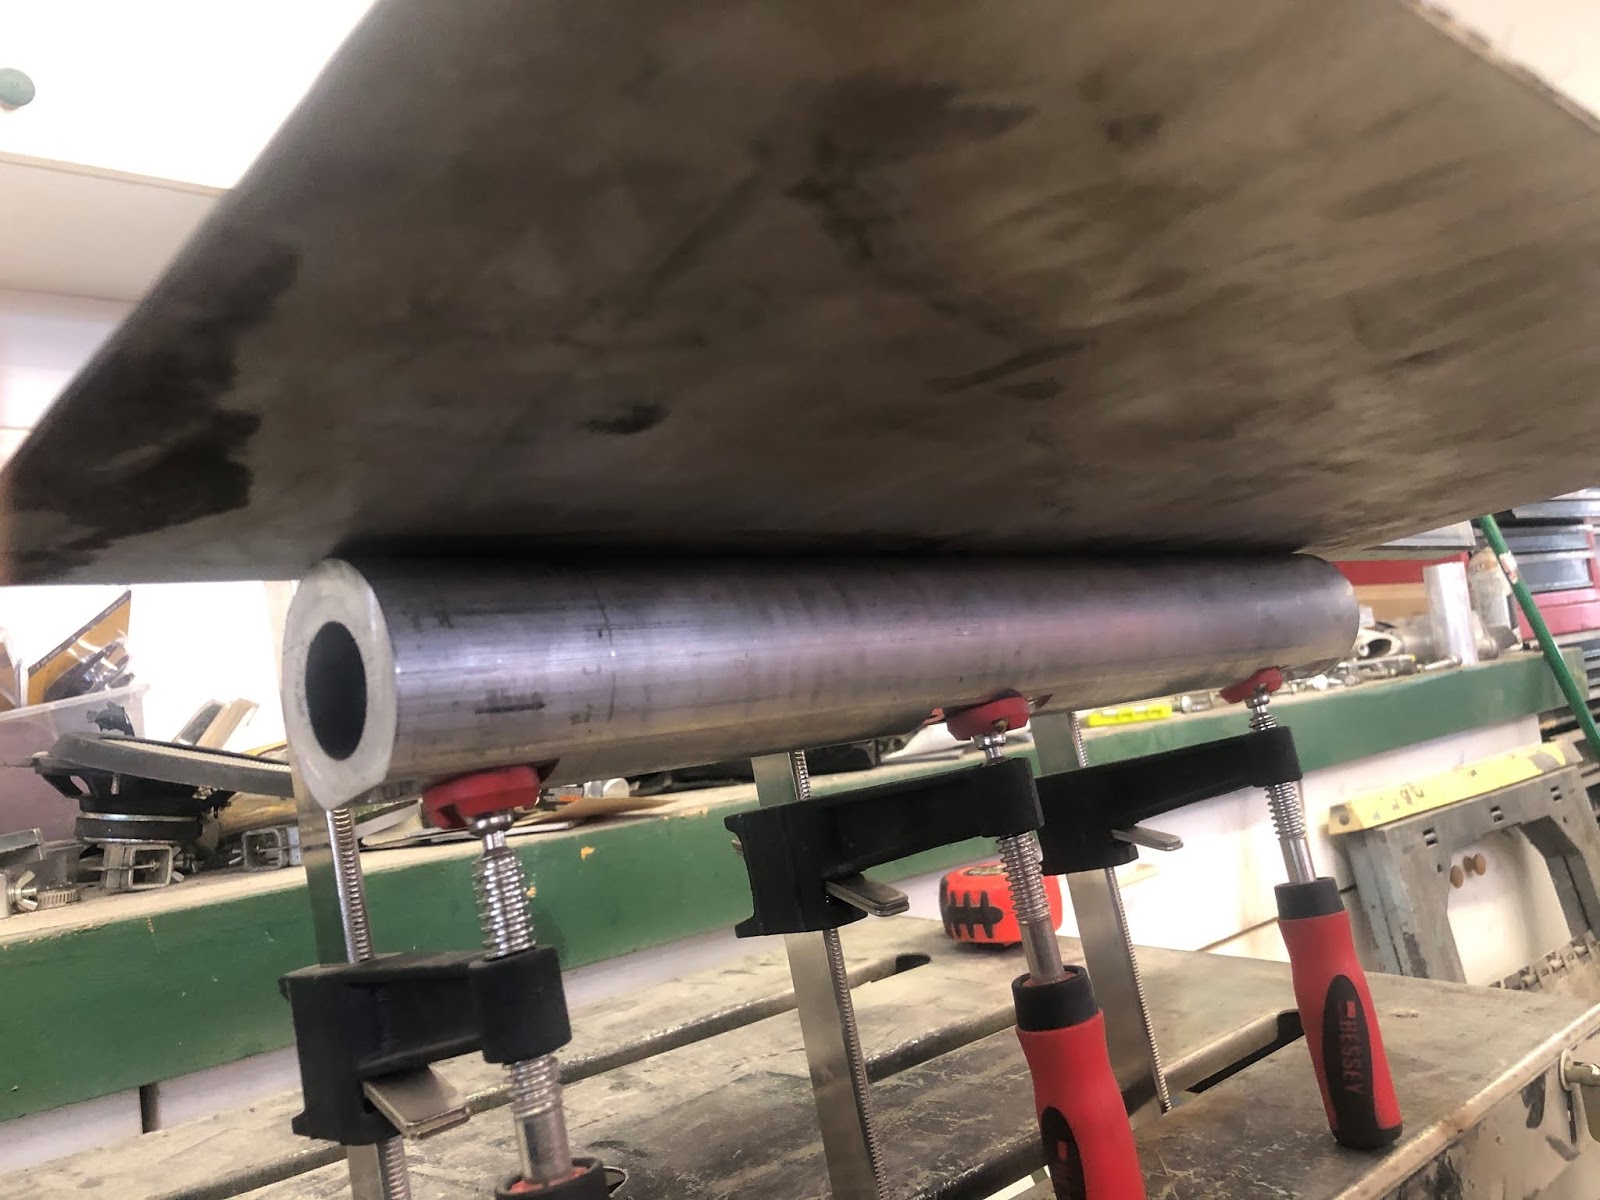
The gap I need to fill is almost 2ft long.  Scrounging around my garage, I found an 18" piece of aluminum tube that is very close to the same radius as the fender (1.125" if you are curious).
While not perfect, it gives me a good start
Using this as my guide, I clamped a piece of sheet metal between the pipe and some square tube.  This allowed me to wrap the metal around the tube giving me a 2 ft wide piece with a consistent bend in it.
Here is the flat sheet ready for bending

Sheet metal wrapped around the aluminum tube
While not perfectly shaped, it is close enough to allow me to work the metal to get it as close as I can.
After working with the metal, I got it really close and since I'll probably be redoing the entire bottom, close enough.
With the shape formed, I next plotted my plan of attack.  With the size of the hole, it would take a big sheet and more fab work than I want to do to replace it all at once.  I decided to tackle the bottom side first and then fill in the upper damage separately
If you look closely, you can see the black mark across the fender showing my cut line (black marks on a black fender, really Mike??).  I tried to make it a straight cut high enough to clear the vent box cut out.
.After a little custom fitting, the patch panel is ready to go in.  Next week, I'll finish welding and grinding before moving on the other holes (and back to the doors).
Not quite a finished repair job but much better than before

The bottom edge.  The bead had enough metal left to make pretty decent welds.  Before doing more than just small tacks, I laid a straight edge across the bottom to ensure it was still straight.
After spending time grinding on one fender, I wasn't in the mood to work on the other.  I was also out of grinding discs and I suspect due to COVID, so was the hardware store.  Amazon (and next weekend) here I come.

One last project was making new body mounts.  I'll have to trim a couple to fit but these are duplicates of the factory spacers.  I also found on McMaster some .12" thick hard rubber gaskets I'm going to use in place of the red resin spacers the factory used.  They are almost the same thickness and they vary slightly so different selections should yield the spacing I need.
New body spacers.  You can see the one old one in the middle.
Next week, more work on the fenders, hopefully finalizing aligning the doors (and frames) and then stitching it all together (finger's crossed).  If I don't get that far, the weekend after that is a four day weekend, I KNOW I can get that far them.


Sunday, June 14, 2020

Weeks 7-9

Last post 2 week and now this one, 3 weeks.  You're probably thinking, "I knew he couldn't keep up that pace."  Maybe but the car was off at the sand blaster the last 2 weeks so it was an opportune time to work on some other projects.  Well, the car is back so I decided to combine the posts.

Week 7
With the garage empty, I had enough space to spread out all the parts.  I had expectations of separating all the parts and bagging/ tagging each one.  My enthusiasm died quickly as i started to spread them out.  There are a lot of little parts and many I didn't even know what they were. 

Instead of bagging and tagging each part, I separated electrical, mechanical and body parts.  I will go through them in the order I need them. 
I thought the easiest thing to do was lay the car out on the floor, bonnet, cabin and boot.  I didn't label each part but did organize by type and location.  Since I intend to build the car prior to paint, I'll have time to go through them.  I think I have most of the major pieces but we'll see.

Week 8
I don't have any pictures for this week.  Since the car was still being blasted, I worked on tiding up a few things.  I finished making the inner fenders and sand blasted a lot of the smaller body parts like the bonnet latch and fender tie plate and inner fenders.  Spent most of my weekend finishing up the A/C installation on my E-Type.  Custom radio/ speaker panel and brackets.  

Week 9
Yeah, the car is back.  It looks SO different blasted down to bare metal.  Not too many surprises and now I can move from rust repair to holey metal repair.
Front of boot section.  Lower sections, I cut out the rust and thought sand blasting would be easier with them removed.  Battery boxes look pretty good.

Side view boot section

Rear view boot section.  I cut out the worst of the rust on the lower edge and sent the car to blasting prior to repair.

Front section side view.  Car had a slight finder scrap some time in its past.  It was so minor, couldn't tell from underneath until everything was removed.

Front right side.
A little misshaped around the bumper mount but no rust.  Odd since there's rust on the driver's side.

Front Left Side
Blaster didn't quite get all the body filler out of the lower edge.  Not a bid deal since I will have to patch it.  A few dents around the outer bumper mount, like the other side.

Odd that the filler piece is filled with body filler instead of lead.  I don't really see any rust so it shouldn't be too difficult to repair

My first surprise.  I had no idea there was rust around the side light.  Both sides.  Not so bad to repair but I'm concerned with the effect of welding on the lead filler.

Lower Front Fender
Not really a surprise but more than I expected.  This will be a lot of work but I can't believe this was filled with body filler before.,

Other fender not so bad bust will still require some work.

I know I'm not done with body work but I didn't want the freshly blasted body to start rusting so this is a single coat of self-etching primer.  Black was the only color I could find local so black it is.  Guess it will help when I add the buff color filler primer later.

From a distance, car looks good, even in flat black primer.

Dash and window pillars are pretty much rust free, not much work to do there.


Back on the frame so I can officially join the pieces back together.  I still have a LOT of work to do on the boot section before its ready, as the next pictures show.

This is the deck lid or maybe the surface of the moon, not sure which one.  The black paint really highlights the pitted sections.  I will probably cut out the worst sections and patch what I can.

The other side of the deck lid, not quite as bad.
All in all, its very exciting to get it back and have all of that done.  I don't have to wait on anyone else until I'm ready for the top coat.  Next week, I hope to permanently attach the sills to the cowl.  After that, I can weld in the fenders.  Then I can focus on finishing the body work on the boot section. 

Wednesday, May 27, 2020

Week 5 & 6

For those of you following along, sorry for missing a post last week, I got distracted.  Besides, I had some distraction so its really a 1.5 week posting.

First thing I worked on was trying to finish the cowl supports so I can get the body off to sand blasting.  I finished getting them in and secured but did have a few setbacks along the way.
Cowl supports are in, attached to the frame rails (luckily with screws) and something told me to make sure the vent boxes fit.  DOPE!!!!  Guess this is what happens when you make your own cowl supports and don't buy them.  I took measurements of the old ones but installed the center support backwards.  Had to take the whole support out to fix it.  This is why you only do tack welds or screws until you are POSITIVE you're done.

So, after a few hours of rework, here is the updated cowl supports with the vent box gap correct.
Another comment to make here though I don't have photos.  I recommend keeping ALL metal removed and replaced.  Even though the pieces I removed were in BAD shape, the witness marks of the old metal provided priceless information.  My first test fit of the doors showed promise but they were a little off.  After tack welding the cowl frame in, the door still didn't align the way I would have liked but thought part of it could have been the door itself.  Well, after examining the parts I removed, I noticed the alignment on the center support and the dash weren't the same so more rework.  After ensuring the cowl supports mounted the same as the factory ones, door alignment was much better.  At least on the driver's side.

After spending some time on the cowl support, the driver's door looks pretty good.  Need to work on spacing but door swings well, hinges are tight and both doors clear the sills.
Passenger door aligns well except for the very top.  I tried making some adjustments on the cowl support to see if I could make it any better but nothing helped.  Since the rest of the door aligns really well, I think its a door issue.  I have some ideas on how to test for that but I'll save that for another day.


Just to provide a little motivation for myself, I installed the fender piece, door and bonnet to just see how everything looks.  I'm excited, it all fits pretty well.  The fender piece I cut out lines up well, bonnet fits well.
Here is another view.  It at least looks like the front of a car.
Its now been 6 weeks since I brought the car home and it still hasn't been blasted.  Mostly, this was due to the fact that there wasn't enough support in the body for me to be comfortable sending it out expecting to get it back in the same shape.  The front half was predominately the cowl support so that was my focus.  For the back half, there was structural rust everywhere.  While not completely gone, I've made major head way on getting rid of it.  I've cut out both fender wells and welded them back in.  I replaced most of the rusted metal around the battery boxes.  Enough to give to the blaster to do his damage.
Here is the finished interface between the fender well and fender.  Still have some welding to clean up bot overall, I'm pleased.

Here is a view of the other side with just tack welds on the fender well.

Here is the finished view prior to cleaning up the welds.  When finished, it should look very close to factory.


Outside well welding finished and ground down.
So what can you do with 8 hrs of free time and a heat gun?  Well, if you have a 70 year old XK120 prepping for sand blasting, you can remove all the undercoating.  The following are several pictures of different parts of the car sans undercoating


Front edge of the rear half.  You can see the metal replaced on the front side where the shut panel mounts.

This was the toughest area to get all the undercoating off of.  One thing I can say about undercoating is it protects the metal underneath from corrosion.

Rear fender, flange not fixed yet.
As Monty Python says, "Now for something completely different!".

In addition to the XK project, I've been working on an upgrade for my E-type for some time now.  A couple of years ago, I replaced the distributor with a Megasquirt EDIS system.  The Megasquirt controller can not only drive the EDIS system, it can also drive EFI.  Originally, I thought I was going to be SOOOO smart.  I was going to take a late model XJ FI system and install it my E.  In case you're curious, an XJ FI system will NOT fit in an E.  Obviously, I'm not SOOO smart.

This didn't end my obsession with installing FI though.  Over the last few months I designed a system using 3D CAD and everything looks like it will fit.  I committed and ordered most of the parts but thought I could make a few of them myself.  Turns out I can but it took 2 days.
I'm not extremely creative so I am modeling my system off the Jag design.  The XK motor has the water exit through the intake manifold.  To duplicate that, I have to create some connectors.  Here is my starting point, a block of aluminum.

!st step, remove all the unneeded material.

Next, to get everything to fit, I have to offset the water manifold so the injectors will clear and it will clear the valve covers.

Tada, everything fits.  The blue parts are 3d printed and waiting on the machined pieces.  Far right is the XJ thermostat housing interface.  Its not exactly in the same location as factory but close enough to use factory hoses to connect it up.

Here is a close up of one set of cylinders.  Since this is my prototype, I need to experiment with intake runner lengths.  I'm using collars so I can test different lengths.  Using the bolt on FI mounts, I can design a system that uses a lot of factory XJ parts or brand new.
To wrap up the weekend, I'm also installing a Classic Auto A/C system in my E Type.  While they have instructions on how to install their system, they don't really provide much assistance in finishing of the installation.  The factory console topper won't work after installing the A/C so I decided to make my own.  Not finished but I have the design worked out.


Well, when you're driving at 70 with the windows down, speakers are pointless.  Now with A/C, I should be able to drive with the windows up.  The A/C vents are in the way so I have to make a new place for the speaker.
Just enough room for the radio on the front.

Final thing of the weekend, body on the trailer ready to go to the sand blaster.